zaterdag 2 oktober 2010

little zipper pouch tutorial!

For those who want a cute item but don't want to lose a lot of time making it:
 My little zipper pouch with keychain!

Supplies people!  :
outer fabric
interfacing fabric
lining to make it nice and firm
extra piece of fabric to attach keychain to
keychain
zipper


I cut my fabric in two, now it measures 12 cm long and 6cm high.
Next you need to iron your interlining on your interfacing fabric, and I also iron my nametag on my interfacing. 
All ready to sew! 
First we will sew the little band that you'll need to
attach your keychain.
fold
turn the tube inside out

sew
                                                              
Put on your zipper foot and sew in the zipper,
 you do this by making a fabric sandwich.
1. Your outer fabric good side up


2.  Zipper with teeth down on outer fabric, all nice and even with the edge of the outer fabric.


3.  Your interior fabric with good side down, ironed interlining is facing up.
Sew next to the zipper et voila:
 
One side is done, now, on exactly the same way  place your other side and also sew this along the zipper.
(other piece of outer fabric good side up, put down your zipper with the already sewn on pieces)

It should now look like this:
 
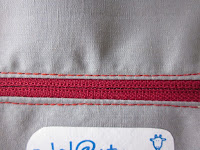
For a clean look I sew again next to the zipper, afterwards it looks like this:
inside
outside

Almost ready!
Trés important, leave open your zipper halfway!!!

Now sew around the perimeterAND DO NOT FORGET to put in your keychain tube between your outer fabric layer!

You leave open a little hole in your interior fabric, this is to turn inside out your creation.

Turn, turn, turn!
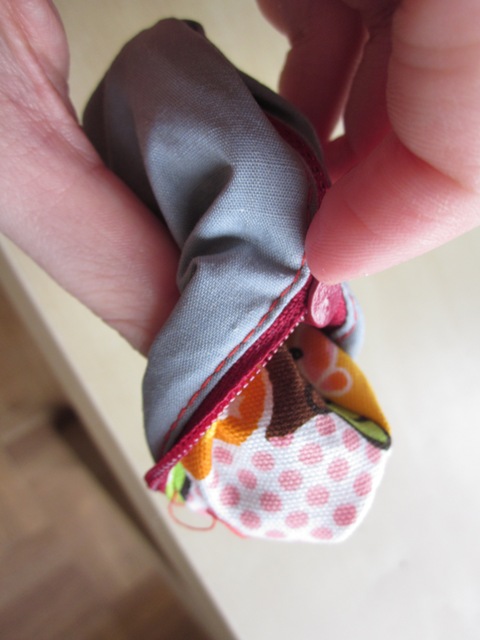
Put your keychain in: TADAA

donderdag 23 september 2010

Fimo apples tutorial

A polymer clay tutorial.
Today I'm making little polymer clay (or FIMO) apples.

Supplies:
-You'll need fimo (duh) in the colours of an apple, I chose red, green and brown.
- An eyepin to push into your clay, this is only optional
-Varnish for fimo and a brush to apply this varnish. I bought some true fimo varnish but you can also use some transparant nail varnish. Or you can leave the apple just the way it is, without a shiny cote layer.
-An oven that can bake your clay for 30 min on 110 degrees. This is how FIMO clay is baked, follow the instructions on your clay!

With the red clay, make a ball 


With a tool you make a hole in your ball, I used the back of a pencil, with my pinkie finger I sculpture the hole untill it looks like the hole you can find on an apple!


Now, roll roll roll your brown clay for the stem! Chop off at desirable length.

Place your stem on the top of your apple, I use a toothpick to attach the stem, you gently push in the brown clay into the red.


Time for the leaf! Make a little, little I  say, green ball.
 Push it between your fingers and shape into a leaf.


With a knife, needle, toothpick... Make lines on your leaf and use the same toothpick technique to attach your leaf to the apple.


Well, all done now! Bake, varnish, use your apple!

vrijdag 17 september 2010

Fimo tutorial for a rose

Today I'm making a rose out of polymer clay (FIMO)
After already posting my results with fimo there is now a tutorial for all the people out there who want to learn the basics of using polymer clay. A rose is one of the easiests things to begin with.
Important things to know when working with fimo: You have to knead it thoroughly untill you feel it is warm and nice and soft.
While working with fimo there will always be marks of your fingerprints. When you realy do not want this to be seen in your project you can try using latex gloves. But for me it decreases the feeling I have with the material. So just make the fingers dirty there!

Supplies:
-Some red fimo, or the colour you want your rose to be.
-An oven that can bake your clay for 30 minutes on 110 degrees.
-Varnish if you want a shiny cote.

Starting with the base of your rose
You take a little fimo and knead it, than roll it out into a sausage.

This sausage you flatten out by pushing it down on a surface, the size of this will determine the size of the whole rose, I made it about 0.4 cm width.
Now you roll up this piece!

Keep rolling it between your fingers!

Well done, can you already see the rose?
Next you need to make little balls, these will be the pedals, again, the size of the balls will determine the size of your pedals and the more pedals you make, the bigger your rose will be.
I made 6 balls.
Now push down these balls between your fingers.


Tadaa, a pedal ready to be 'glued' onto your basis.


Keep sticking together your pedals and your rose is ready!


No you just chop of the exces stem and remodel your pedals untill you like it.

Time to bake it!
Remember 110 degrees and 30 minutes. It is ok to bake it longer on a lower temperature but it is not ok to bake it shorter on a higher temperature .


Now, when you like some shine, varnish it!


And your done! You can glue it onto a ring, an earring, a brooch...